Freelance Portfolio: Initial Setup Guide
Published: February 24, 2026
Updated: February 25, 2026
I’ve always found building a portfolio frustrating. I didn’t come from a background or career that required one, so none of it felt intuitive.
This template came out of every attempt I made to pull a portfolio together across different formats, including a website, Canva, a one-page document, and Google. I tried them all, and I struggled with each in a very visible way.
Eventually, I realized the real gap was not effort. It was execution. I lacked a system and continuity. I build those best either on paper or inside Notion’s database structure. So this portfolio system is built on the same structure I use to design my resume, translated into portfolio building — designed for people just like me who struggle through building their portfolios.
(Currently, I have two specialized profiles; one for social media management and another for Notion consultancy. This is how the Notion consultancy version looks like as of writing.)
Step 1
Update Your Bio
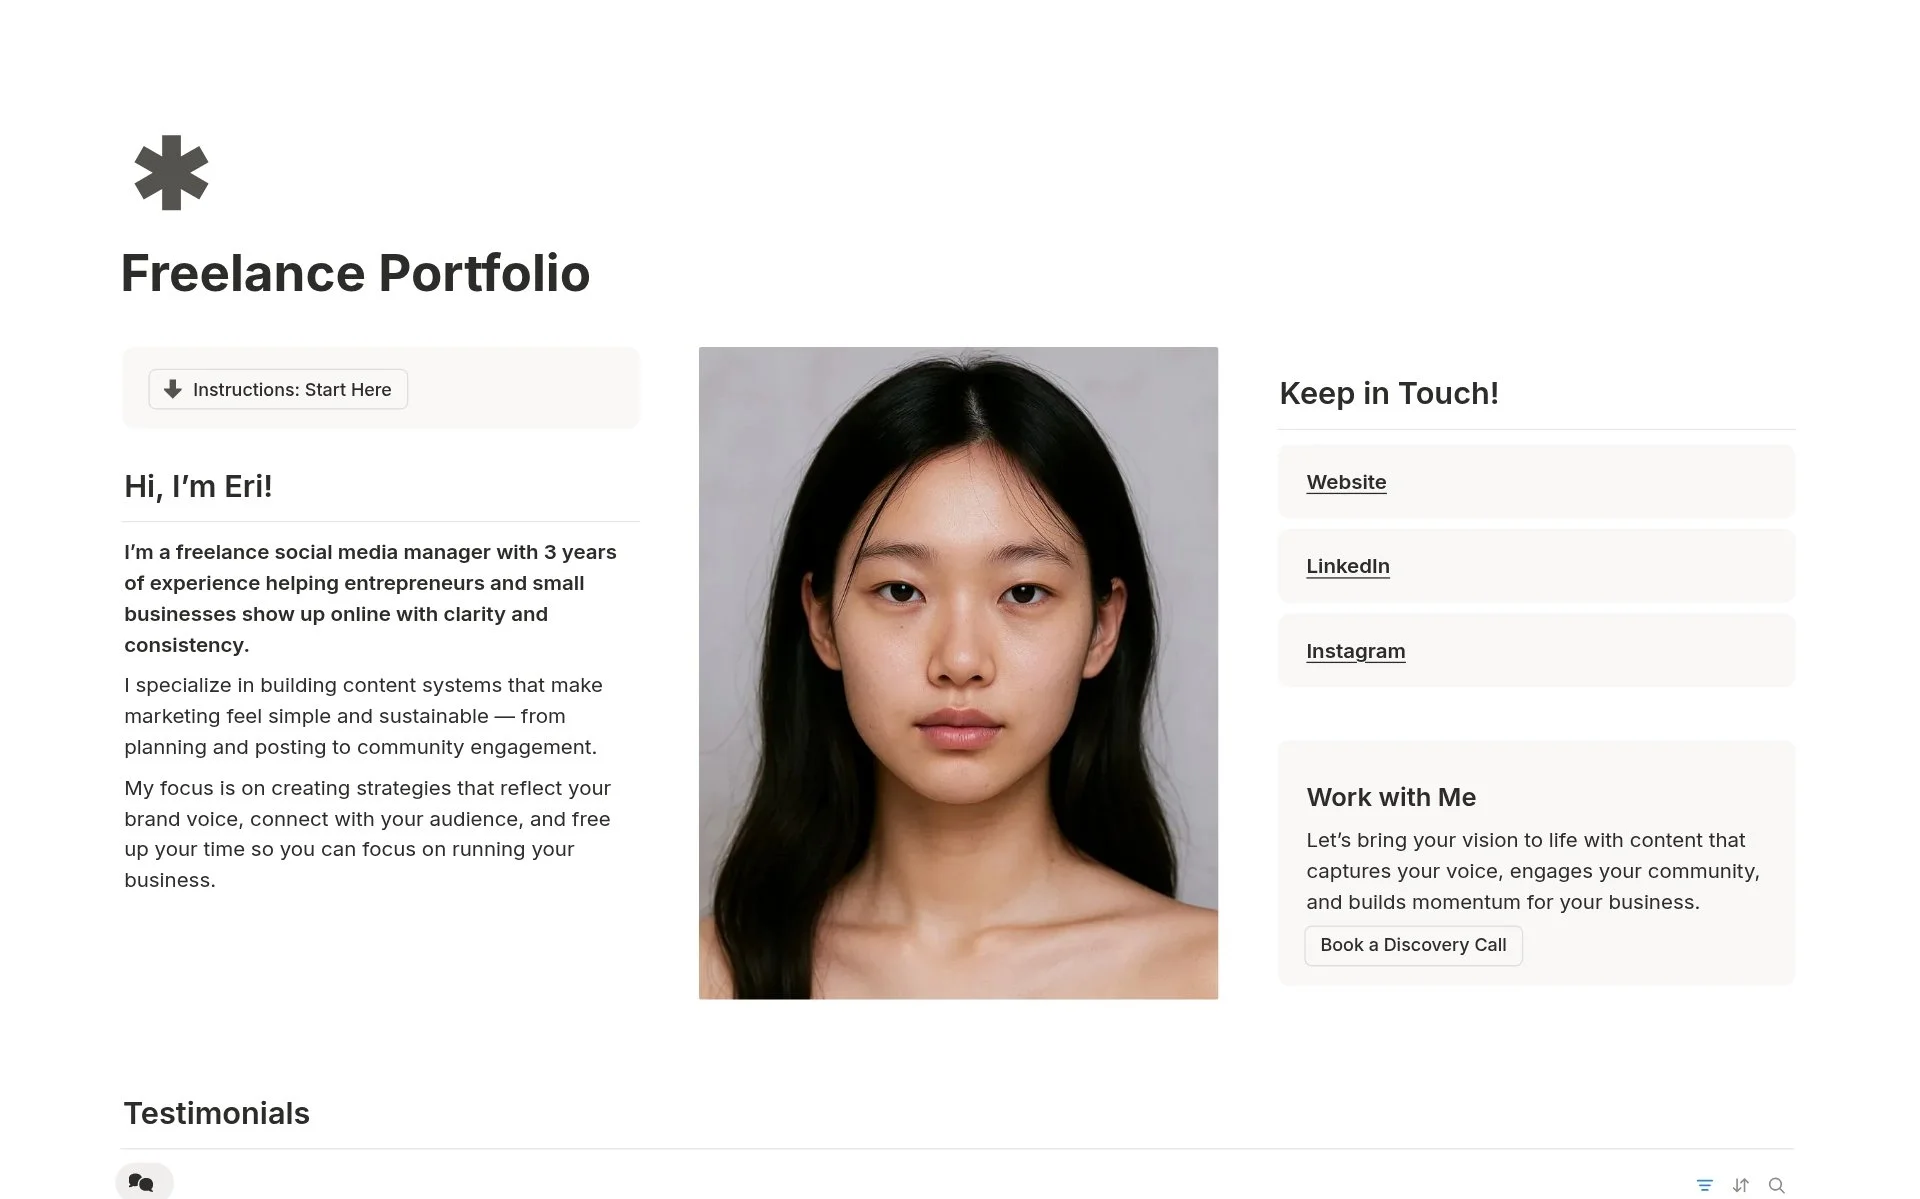
The first thing you want to setup is your bio, which is the first thing you or your potential client will see.
You can use this area to introduce yourself, explain what kind of work you do, or share how people can collaborate with you. Feel free to adjust the tone so it sounds more like you whether you want it to feel friendly, professional, or creative.

Front Page - First Section
I found this layout to be the most optimal because it introduces my profile to the potential client and gives them the necessary navigation in case they want to hear more from me or work with me.
Step 2
Add Your Clients
As a freelancer, you’ll likely have different projects for different clients, or maybe even different companies for a single client.
The goal here is to build pages that you can link to projects, differentiating projects from the companies you work with. This makes it easier to pin point specific metrics that support skills related to projects, and just make it easier to build case studies which I believe are the paramount exhibits in a portfolio.
In the client page, you can include as many details as you can and add your own properties to fit your workflow, such as niche, tools used, or project duration.
Step 3.
Build Projects
Now, start thinking about your career in terms of projects under specific companies or individuals that you’ve worked for. These are the key things you’ve worked on or initiated yourself.
If you’re a marketer, that might be a campaign you led or helped build.
If you’re in operations, it could be a project focused on improving systems or workflows.
Add as many projects as you’d like. The more you can see your work history, the better you’ll understand your progress and impact. Just remember to feature four or fewer on your front page to keep the layout clean and seamless.
Step 4
Link Skills to Projects
Now that you’ve added your projects, it’s time to parse the skills you’ve learned through them.
Connecting your skills to each project helps you quickly see where you’ve applied your strengths and what results they’ve produced. It also makes it easier to build a portfolio that shows proof, and not just a list of abilities, but real examples of how you’ve used them.
This setup lets you highlight the projects that best demonstrate the skills you want to grow or offer in future work. Over time, it becomes a clear record of your experience and credibility.
Step 5
Build Testimonials
Compile your testimonials and link them to the clients and projects in this database. Doing this helps create a full picture of your work ethics.
These testimonials give potential clients a better sense of your work style, reliability, and results. You can add as many as you’d like, but for a clean and balanced look on your dashboard, limit the featured testimonials to four people or less.
Step 6
Build Client Pages
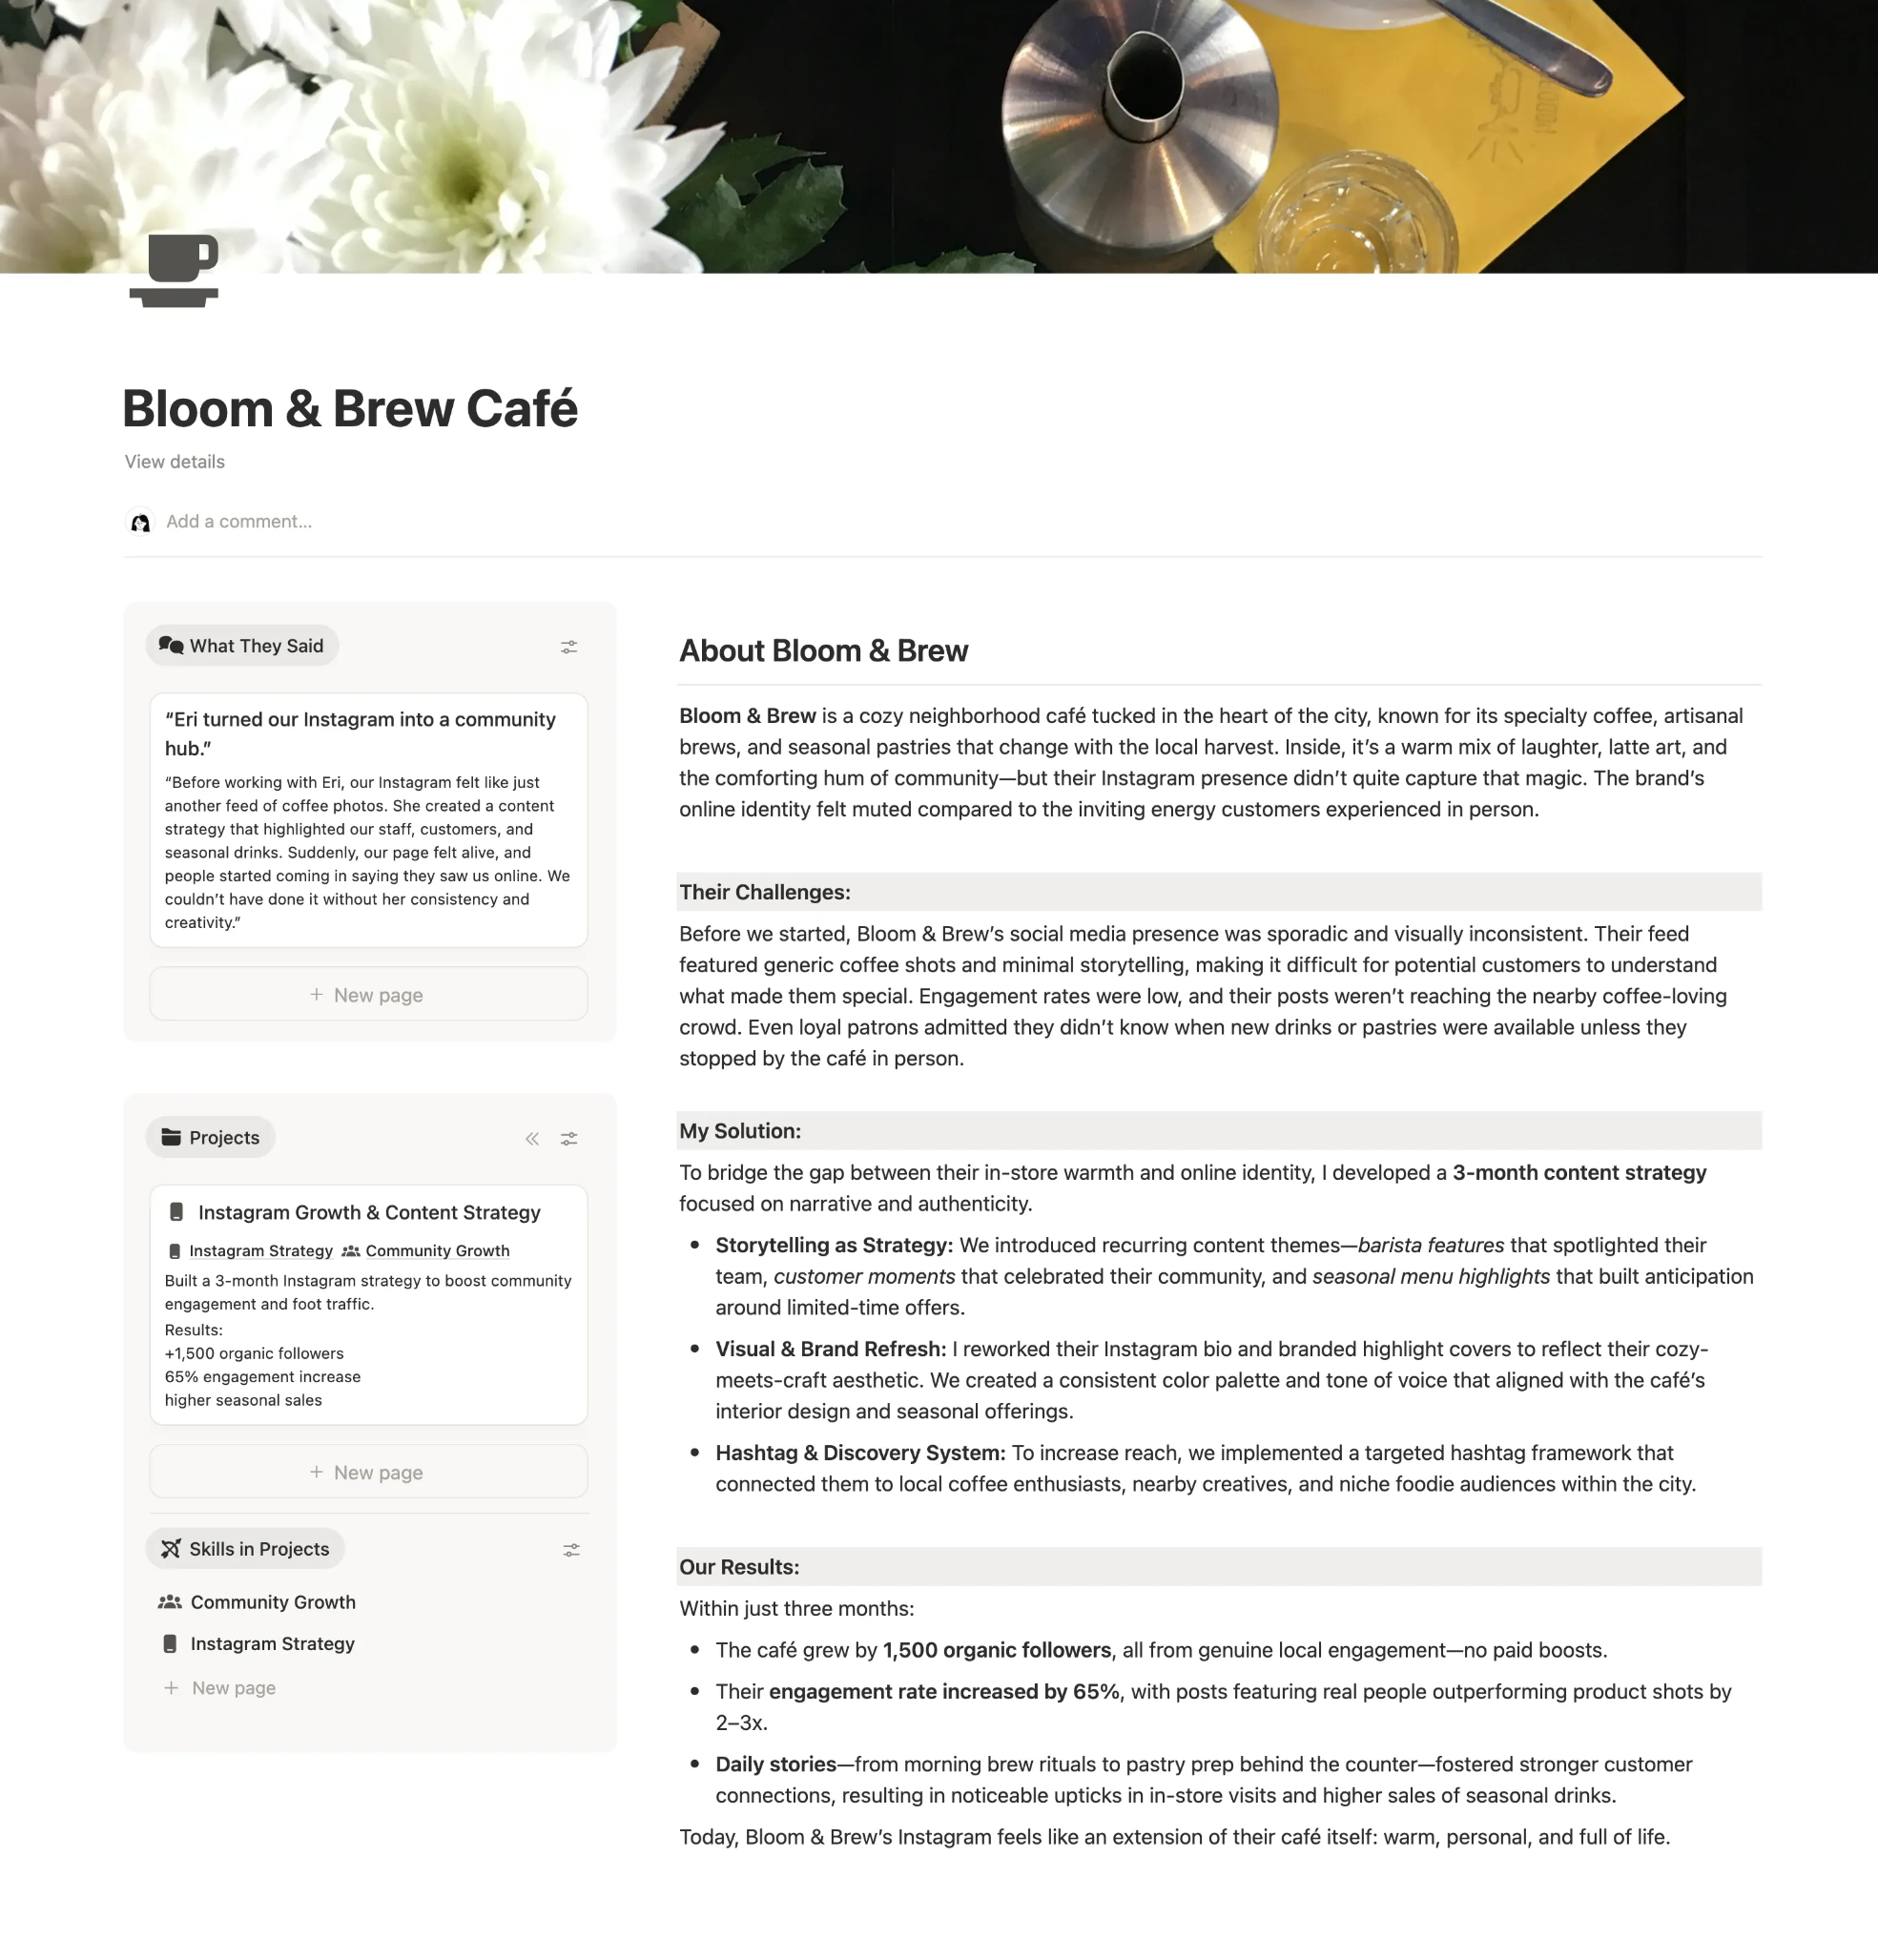
Sample of Client Page
Your client pages will be templated based on the pre-programmed default templates.
Based on the data you’ve added to this dashboard, the left side of your client page will automatically display all related testimonials, projects, and skills you’ve used for that specific client.
In the dedicated client pages, you can write a short overview of the project you worked on or the retainer services you provided.
This helps tell the story of your work and gives more context to the results you’ve achieved.
On the right side, you’ll see a sample dashboard layout you can customize for your clients. This serves as the default template you can modify as you like.
The left section will automatically update to show their related data, while the right section will have sections and prompts.
Step 7:
Frequently Asked Questions
If you’re offering a specific service, it’s natural for people to have questions about how you work or what’s included.
In the dedicated section, you can add the questions you’re most frequently asked, along with your answers. This helps potential clients get clarity right away and saves you time from repeating the same explanations.
Need help?
If you have any questions, you can fill out my private feedback form or reach out to me directly. Instagram sometimes doesn’t notify me on new message requests, so I recommend going the form route first. :)